'72 Series III 88"
History
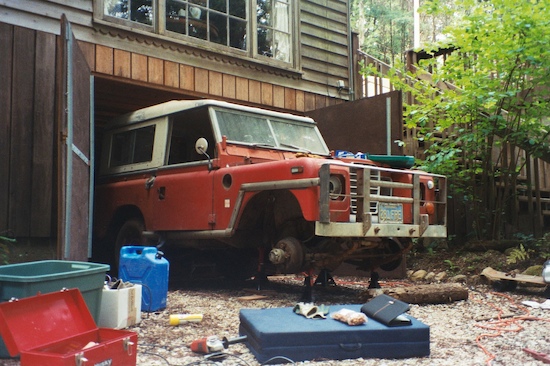
The Rover was purchased at the end of the summer of '02. After which it sat in a dark garage for 10 months. This is the Rover's first breath of fresh air. My first step was to remove the wheels so I could get a good view of the frame, brakes, swivels balls, and suspension. |
|
|---|---|
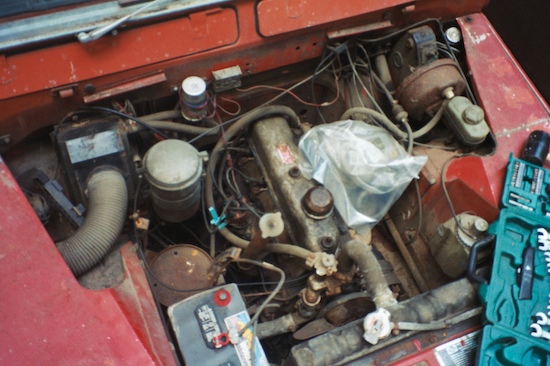
First view of the opened bonnet, actually it has been removed. For having stood in such a humid environment, for so long, I was very impressed with the lack of corrosion. The battery box turret, which also holds the air cleaner (removed in picture) showed considerable signs of rust however. Most likely a leaking battery in the past. |
|
 |
Fortunately, the rest of the frame showed only surface rust. Thanks to the numerous oil leaks, much of the inner portions of the frame rail still had factory paint. The frame under the load bay had also been spared of rust...California car. Here we can see the tunnel cover, floorboards, majority of seats, and parking brake access panels have been removed. The seats were found to be in horrible condition, something that would be rectified later in the summer of '03. |
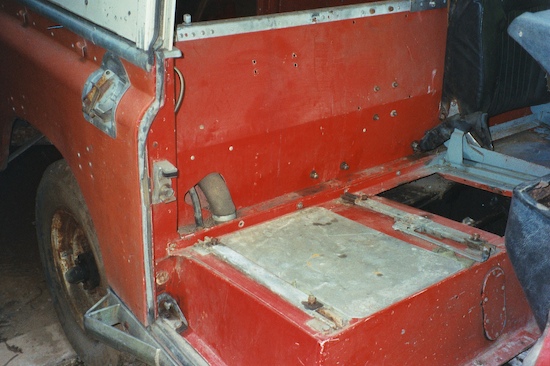 |
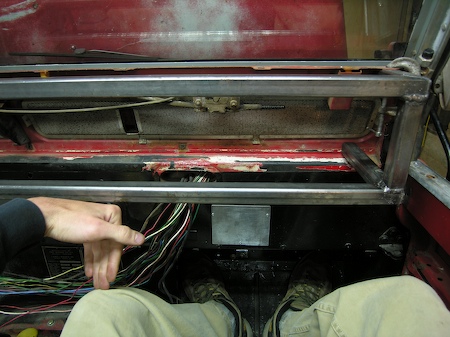
From this perspective, we can see two rubber hoses protruding from the bulkhead located behind the seatbox. The large hose carries the fuel from the filler on the outer fender into the 11 gallon fuel tank located below the passenger seat. |
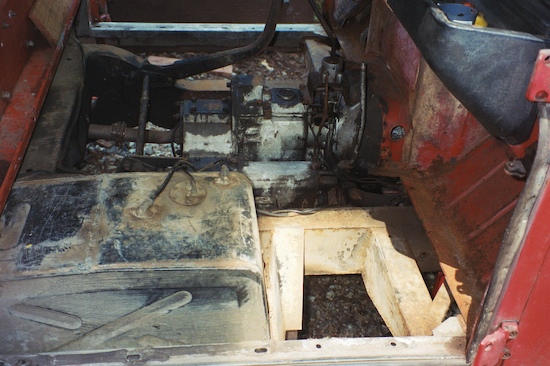 |
Now that the seatbox has been removed, the fuel tank can clearly be seen. Little rust was found, and no signs of leakage were present. The entire gearbox was now finally visible to the wire brush. |
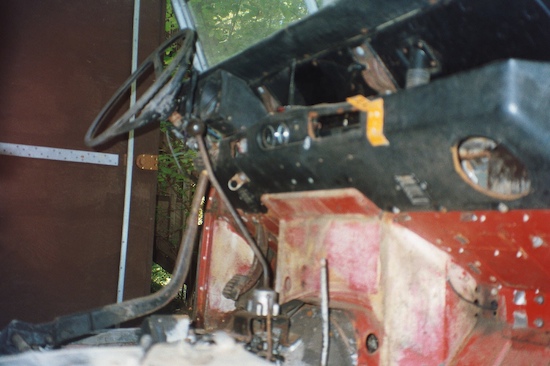 |
The dash was initially thought to be in good condition, but upon further inspection, all of the vinyl was found to be hardened and prone towards cracking. The decision was made to forget about the dash, which on the SIII, is not very attractive to begin with. |
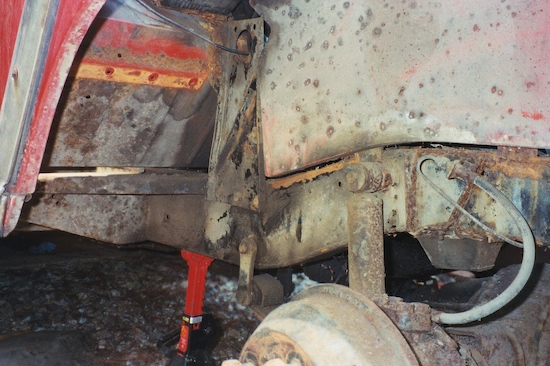 |
This image places us in the RF corner of the vehicle looking towards the rear. Some rust can be seen above the bumpstop, which can be attributed to a leaking battery. Also visible is the wheel-well side of the passenger footwell. This panel was found only to have minimal surface rust. |
1, 2 skip a few |
|
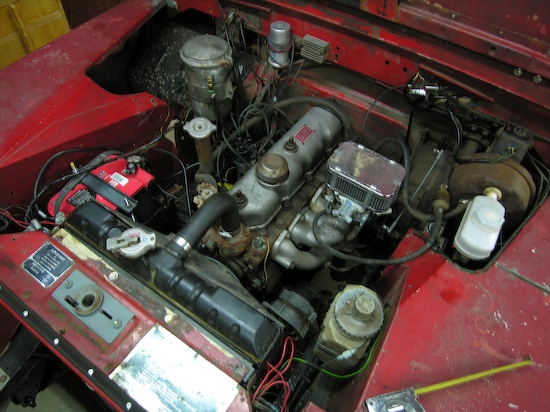 |
Jumping ahead in time as I've currently mislocated my frame off refurbishment pictures! A new Weber 32/36 DGV Carburator has been added, as the one which came with the truck had seized it's 36mm barrel. This was purchased from: www.PierceManifolds.com The truck came with electronic ignition by Luminition, and an Amsoil secondary oil filtration system. New radiator, rubber, battery, fan belt, master cylinder, brake lines, clutch everything... |
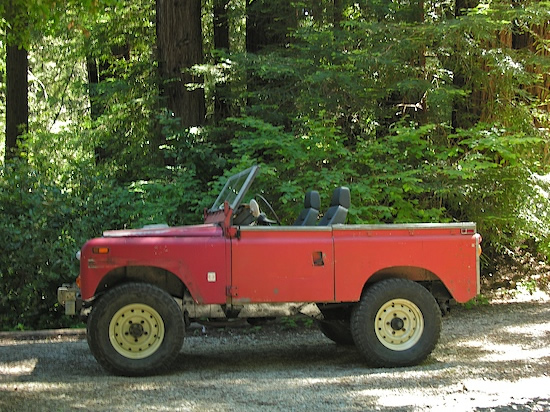 |
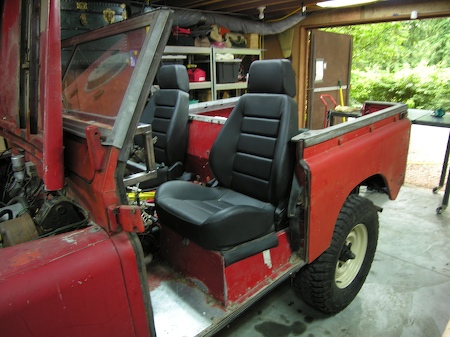
As the truck stands now, it runs topless. I've added NATO wheels painted in Limestone, Goodyear MTR tires as hand me down from the Range Rover (265/75 R16). Corbeau seats (Sport Seat) are a great fit and I couldn't ask for better, except maybe leather instead of vinyl. The side sills have been removed as well. I rebuilt the front axle to get the swivel preload back into speck. |
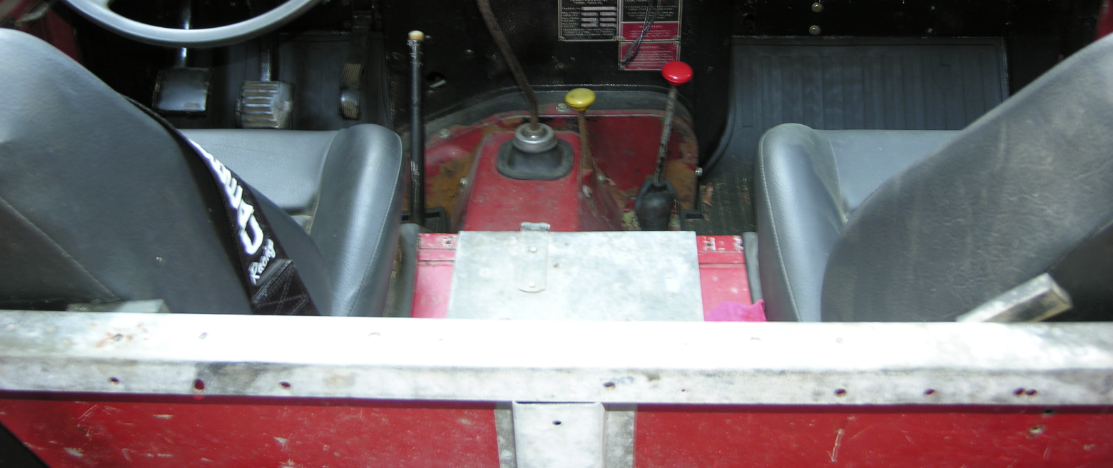 |
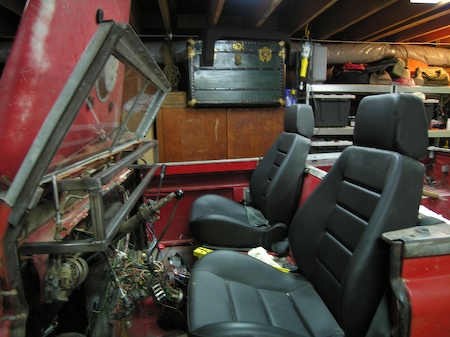
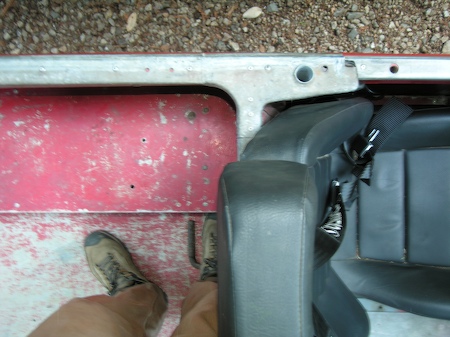
This picture shows the rubber bumpers I used behind the seat backs. I know they belong on the truck somewhere, but I don't know if this was their intended purpose. They do the job well though. One appears to need some rotation... Also visible are some rubber floor mats and new shift gaiters. Good view of the seats too. |
.jpg) |
This image shows the complete lack of a dash. I just don't like the plastic/vinyl dash that comes on the Series III, so I've decided to create my own. In this manner, I can be assured of the dash meeting my every desire. The cockpit, is the way we interact with our vehicles, why not make mine the way I want it to be? I guess we will see how it turns out... What is visible in this picture is a frame I welded up. This frame will serve as the backbone of the dash and will be galvinized once completed. |
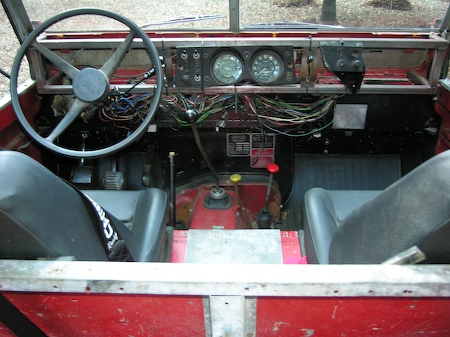 |
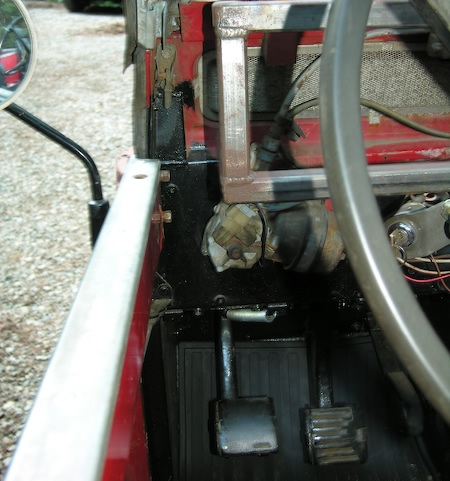
From this vantage, you can see that I've zip-tied the SIII gauge cluster to the center of the dash frame. Obviously this is temporary. Does look a little funny in town though. The bulkhead vent levers have been modified to work in their new oreintation and location, this was no small feat. On the passenger side is the auxillary switch panel which houses the "hazard" switch. It turns out that this switch must be installed for the turn signals to work. |
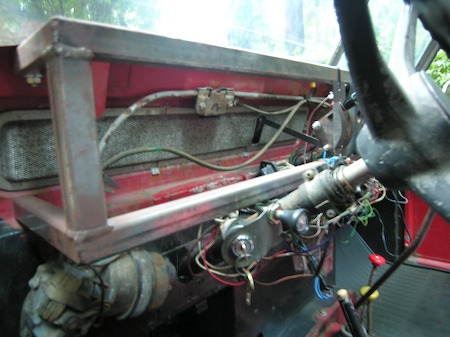 |
If you look just above the steering column, you can see the changes made to the vent lever bracketry. Let me know if you would like a closer view... In the bottom left is the wiper motor. |
 |
The aluminum rectangle at knee level is a blanking plate I made. This is where the heater ducting passes through the bulkhead. My heater is not presently installed. Incidently, this is where the steering column passes through on right hand drive vehicles. The bulkhead was given a coat of POR-15 paint a couple of years prior when I had the truck broken down to the frame. |
 |
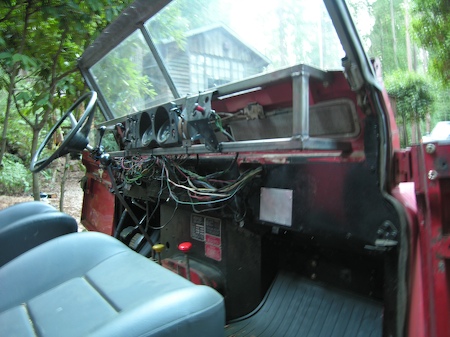
I built the dash frame with the thought that one day I would build a roll cage for the truck. I have left 2.5 inches space on either side to accomodate the a-pillers of the cage. |
 |
I have also left what I believe to be ample clearance for the knees. I have very long legs, and in a relaxed position I have exactly 5 inches (exact length of my middle finger, which is a handy thing to know) of clearance. Also visible is the back of the vent which has a bug screen to minimize that "bug in your teeth look." If you really want bugs in your teeth, the windscreen can be folded down. |
 |
Another view of it all |
 |
Some people have expressed an interest in the seats I am using. The seats are made by Corbeau, and are the "Sport Seat" model. Having headrests was a mandatory safety requirement for me, especially with a slow rover. |
 |
The seats fit in the stock location very well, the only difficulty is in mounting them. Mine are bolted directly to the seat base, but when I get the chance, the seats will be attached to quick disconnect mounts. Of course, I'll have to make those. |
 |
The fit of the seats in the rover compatment is very nice. The seats actually look like they belong, which was important to me. |
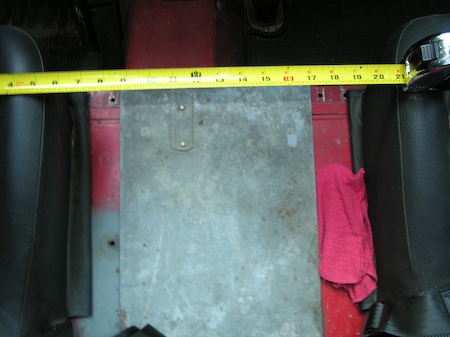 |
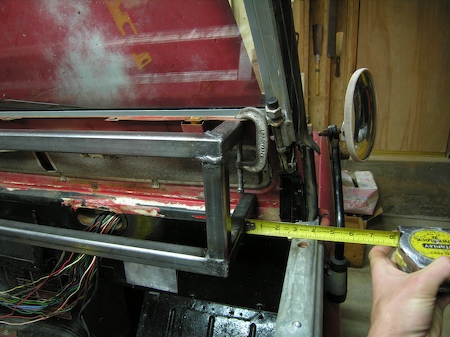
With how I have the seats mounted, I have roughly 15" of space between the seats for a cubby box. The galvanized hatch, seen beneath the tape measure, can easily be removed. A real ticket for adjusting the parking brake and at the back of the gearbox. |
 |
This picture illustrates the problems that I will have with integrating the a-pillar of a roll cage. On both sides, the nuts securing the door hinge to the door present a problem. Additionally, the drivers side has interference from the Wiper motor. A fellow rover enthusiast suggested that I relocate the wiper motor and alter the cable/tubing to suit. Perhaps, low profile nuts would allow enough clearance. |
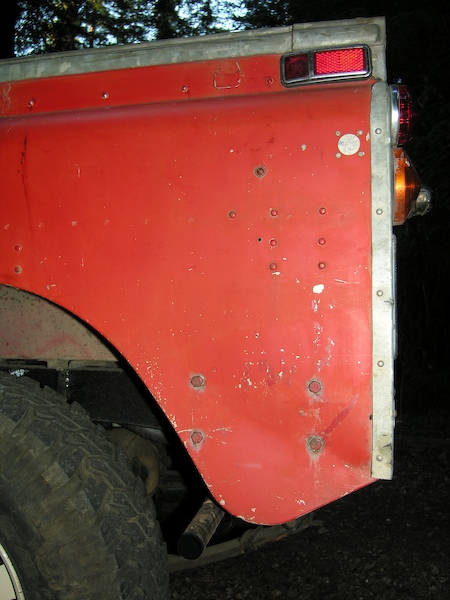 |
A very cool little modification made by the previous owner. The side tail lamp, visible just below the galvanised capping, has been relocated to it's present position. Immediately below the lamp, is the factory location. The round galvanised hole with the pop-rivets surrounding it. Below all of this are four large bolts in the base of the fender. I do not recall having seen this on another rover before. I believe the bolts secure a piece of plate steel, which exists to strengthen the fender. |