My Galvanizing Experience
I thought I knew a lot about galvanizing. I had researched in an on-and-off pattern for many months. From communications with others, I learned that (much like painting) better results come from better preparation.
Other subject headings that you may find to the left, are full of the details of construction. What I will try explain here, are the intricases that you must be aware of when having parts dipped.
The Process:
1 - Caustic Solution |
|
|---|---|
2 - Rinse |
|
3 - Pickling |
|
4 - Zinc |
|
5 - Cooling |
The Obvious:
1) Bare Steel - Your parts must be completely devoid of any chemical, or you will have bad results at the localized area. |
|
|---|---|
2) Hanging - Everything you drop off must be able to hang from a piece of wire. Unless you have 100lbs of bolts, your parts must be able to hang. |
|
3) Ventilation - You must allow air, caustic solution, and zinc to get both in and out of your parts. |
Silicon and Phosphorous:
This came as a serious surprise to me. If your steel contains concentrations of Silicon and/or Phosphorous greater than approximately .5%, then you may have undesirable results. High concentrations of these molecules can cause your steel to be unexpectedly reactive. What does that mean? It means that zinc will adhere to that area much better than anywhere "normal". Why is this bad? Welding wire and rod often contains a higher concentration of these molecules than the base metal. The effects of this would not be apparent in typical fabrication. When performing restoration work (welding in patch panels, building up material thickness, etc) will cause this effect to be especially apparent. Unfortunately for me, it was far to late to rectify this problem. My results were not to bad, but metal that had been flushed with a flap wheel now showed my welding efforts. This is very similar in concept to a detective searching for fingerprints, except this detective finds every weld. Think about this one, it is rather siginicant. Avoid this problem if you have the means and knowledge to do so.
Dialog:
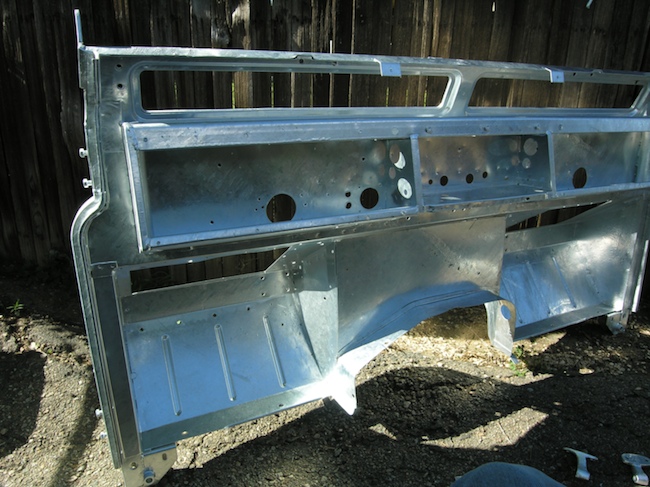
Do not bring your parts looking like what you see below. You must get your parts back to bare metal. There are two choices: Sandblasting and Chemical Dipping. I chose to have my parts chemically stripped, this means that they are emmersed in a solution for approximately 24 hours. This solution is capable of removing just about anything, and can do so inside all of the nooks and cranies of your parts. Sandblastinc only cleans the exterior, which basicly defies the whole point of having your parts galvanized in the first place.
So, why do you care if the inside of your parts look nice? You don't. The galvanizing process is a chemical reaction, for the reaction to take place bare steel must be present. If the interior of your parts are not clean, then they will not be coated in zinc. Land Rovers generally rust from the inside out. Parts can look great on the inside, but have all sorts of structural failures just waiting to happen. If you are going to the trouble to dip parts, you must ensure that you will have an interior coating.
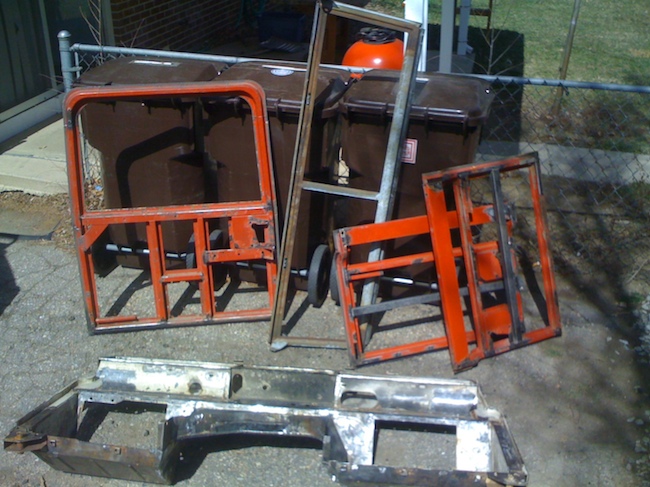
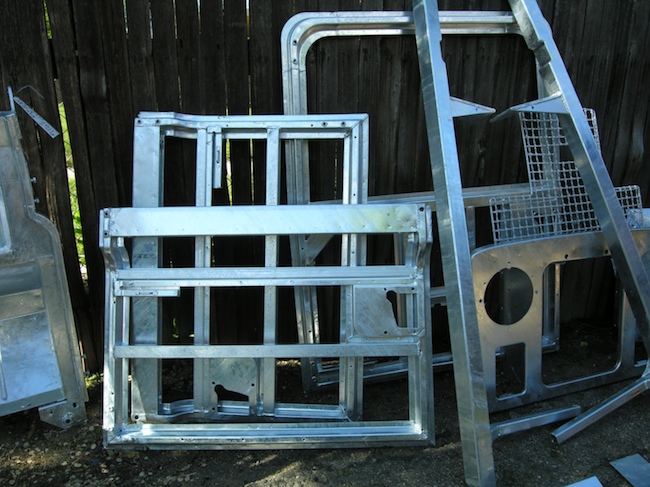
The above door frames were disassembled, this means I drilled out about 75 spot welds on each door. Why would I put myself through such pain? About 6 years ago when I purchased the truck I did my best attempt at a refurbishment. Down the frame, and back up again to being a functional vehicle. At the time, I thought it would be a great idea to use expanding foam on the inside of the door frames to prevent further rust. Unfortunately, this foam cannot be removed in any chemical manner. Trust me, I looked into it pretty deep. The foam had to be mechanically removed, thus a rediculous amount of work. While I was in there, I decided to go all the way completely repair the doors.
Welding slag will cause problems. A wire wheel on a grinder is the most efficient removal method. Eliminate all paint pen marks. These definitely show up. Sharpie pen marks turned out to be a tough one. My testing with MAP gas shows the ink to be quite resilient to high temperateures, and porous materials. I removed mine before dipping.
 |
 |
|---|
Your parts will come out best if hung from a corner. Why? As the parts are drawn up and out of the pool of molten zinc, the the extra metal will be pouring off of it, much like hot oil. The zinc is also cooling quite rapidly in the relatively cold air. As a result, it is very common, in fact expected, to have runs on your parts. The goal is to minimize this effect as best you can. If your parts are not able to drain zinc to pointed bottoms, you will end up with lots of excess material.
You must also allow for proper and rapid drainage of excess zinc from the interior extent of your parts. If the zinc cannot get out from the position that it is hung at, you will end up with internal pools of zinc. This has two outcomes, both cost you money. First, if your parts are left hanging for sufficient time, you will end up with solid masses of zinc inside your parts. Second, if the parts are set on the ground quickly after the dip (standard practice), then the zinc may find a new path out of your parts. Why is this bad? The zinc will now be quite cool, and as a result will leave thick, sharp, and ugly runs across your otherwise smooth parts.
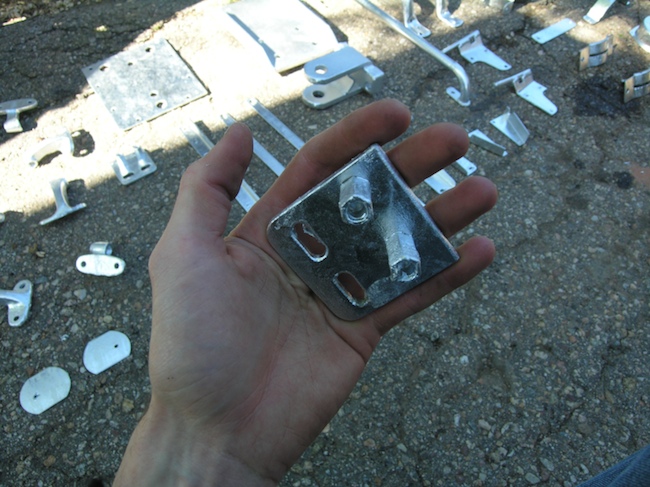
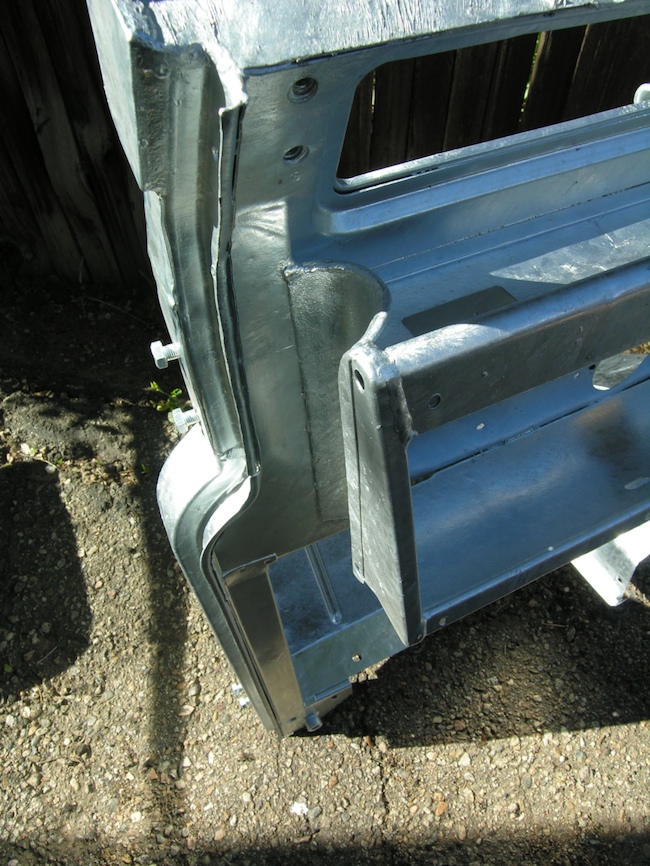
Notice the diagonal lines on the parts. This is a good thing, as I explained above. Prepare for this with your drainage holes. When you drill a hole for this purpose, let it be no smaller than 1/4", shops actually have a declared minimum of 3/8". Drill your holes in the absolute corner. Don't try to avoid a weld, don't try to put the hole in the center because it will look more natural later. If you do not heed this advice, your parts will actually look worse. Currently available, are aluminum and zinc "bung plugs" which can be used to plug undesirable holes. Obviously, these are pounded in after the dip, then they can be ground flush.
Don't forget about the acidic solution (pickling). If the acid can't get out, then you will definitely have a problem with the zinc. Doubly bad, actually. First, the problems mentioned above, second, the acid can actually ruin otherwise bare metal. How? If the acid can't get out, then it will be ejected/vaporized when the parts are lowered into the zinc. This activity causes the majority interior of your parts to be contaminated and thus the chemical reaction cannot occur. To think, "I don't care if there is a chunk of zinc inside" is a failure to realize the consequences of the acid initially being trapped.
On must also pay attention to ventilation. If air pockets will be trapped in your parts, then you will not receive a coating of zinc in this space. The dippers do their best to move the parts around, which helps to minimize these problems, but there is only so much that can be done, especially at the end of an 8hr shift.
My Experience:
Day 1 - Tuesday:
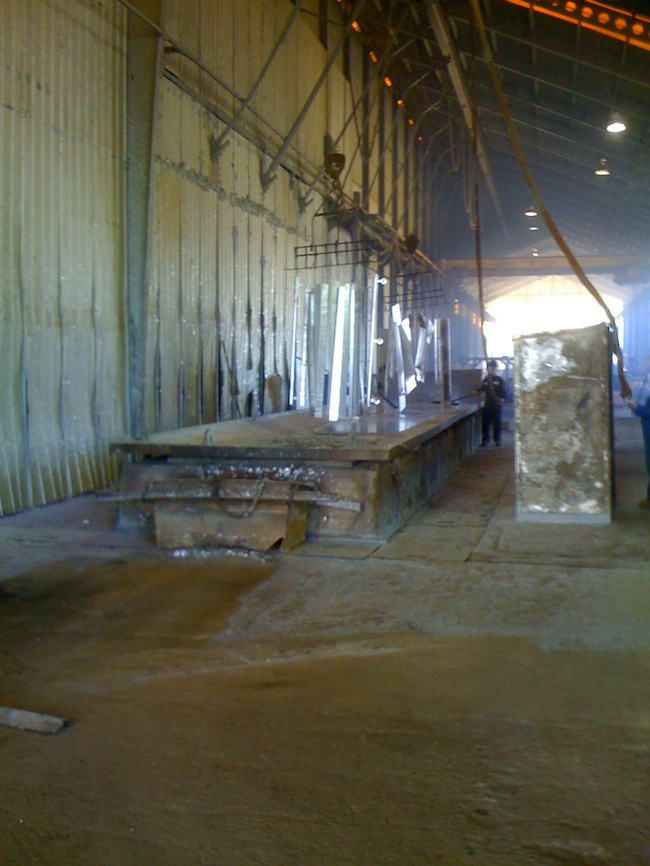
After a year of parts gathering, fabricating, repairing, and preparation, I arrived at North American Galvanizing in Commerce City (Denver), 6:45am by the way. I had spoken with Randy several times about my scheduling limitations, and the extent of what I wanted to have dipped. To put it mildly, Land Rover parts do not belong in a modern industrial plant. Most parts in the yard require a forklift to be moved, some bits weighing 15,000lbs. There were ski lift towers lying all about... So, Tread Lightly. Unless your dipping a bunch of bumpers and rock sliders, they are essentially doing you a favor. The additional time necessary to deal with small brackets, rare parts, and sheet metal bulkheads simply does not fit their business model. In my case, a strong desire to learn, an explanation of my expectations (very reasonable), and the conveyance of my efforts proved beneficial. Randy was a wonderful fellow to work with. He was genuinely interested in what I was doing, and wanted me to be happy with the results. Expecting to drop off parts and get home, I quickly learned that this whole event was going to be more complicated.
A lengthy inspection of my parts ensued, and curiosity seemed to grow among some of the dipping managers. Many problems were found, and I realized how precise drainage and ventilation has to be. At Randy's advice, I decided to hold off. Randy suggested that I return for Wednesday's Seminar, so I did.
Day 2 - Wednesday:
I learned more about galvanizing than I thought I could ever know. A three hour seminar and turned out to be a fascinating experience. Out of ten people, I was the only one taking notes. I was also the only person not getting paid to be there. The seminar was free by the way. I got to skim the zinc pool, that was pretty neat. We watched some piece of sheet steel get dipped. I have to say, I had no idea how violent this process is. Typical factory equipment aside, as the steel was lowered into the zinc, molten metal was flying and popping everwhere. You would get hit anywhere within 20 feet. Keep in mind, this was simple steel plate, nothing complex like hollow parts.
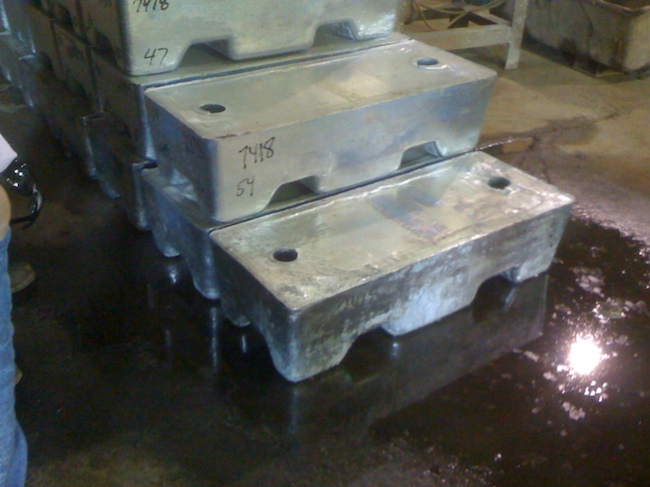
2400lb zinc blocks. 1 or 2 are dropped in every night. They are completely melted in under an hour. There is approximately 600,000lbs of zinc tied up in their tank. This zinc sits at 842 degrees F 24 hrs a day. This is vey similar (in concept) to the glass that I use, please see the "Life in the Hot Shop" page to learn more abou that.
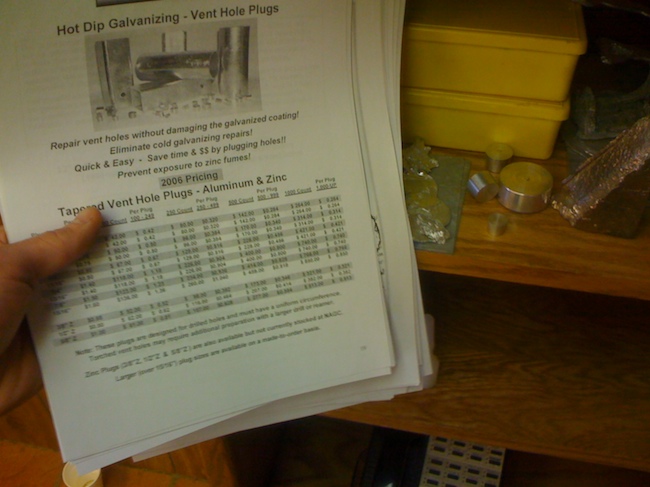
Want to learn more, check out these .pdf files below. The files belong to North American Galvanizing, and are offered as a resource to a limited interest.
* General Guidelines .pdf file
* Fabrication for Galvanizing .pdf file
Day 3 - Thursday:
As I had to leave for CA on the following Tuesday, Randy promissed that my parts would be ready for pickup on Monday morning. Sure enough, every thing came out great and right on time. Today I dropped the parts off, not without a significant loss of sleep to the garage the night before. Come to think of it, I only got a couple hours of sleep before I was up before dawn.
Day 4 - Monday:
What a stressful weekend, that's all I can really say. I'm pretty young, don't have kids, but I do have Land Rovers. To say that I was apprehensive on Sunday night just doesn't cut it. What a great morning it turned out to be. Payment was a breeze, and I was very pleased with the price. If you would like to know what it took, send me an email.
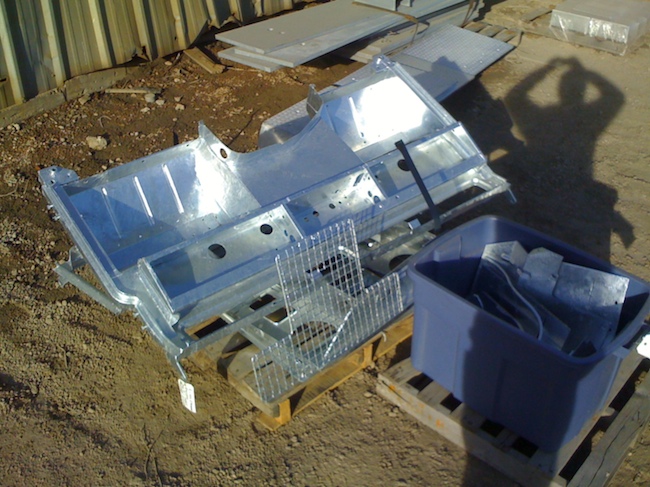
A pile of old Land Rover parts. Yes, my bulkhead has been stacked upond three door frames and my windscreen. I got lucky, nothing really got bent. There was a large ding in the bulkhead gutter, but this kind of stuff is to be expected. There were approximately 80 small parts in the rubbermaid. I had so many small brackets it was silly, but they got it done and the parts came out great.
Conclusions:
I was very pleased with the results. I would definitely go back again for another round. I probably will too, though probably not with so many LR parts at once. I see many artistic application for this process. I have heard of people having bad experiences with galvanizing shops. I think this is largely due to attitude, and a bit of bad luck. In the end, a kind, patient, and understanding mindset will do more for you than anything else besides preparation. Good luck with your dip, please email me if you have any particular questions. A gallery of the results:
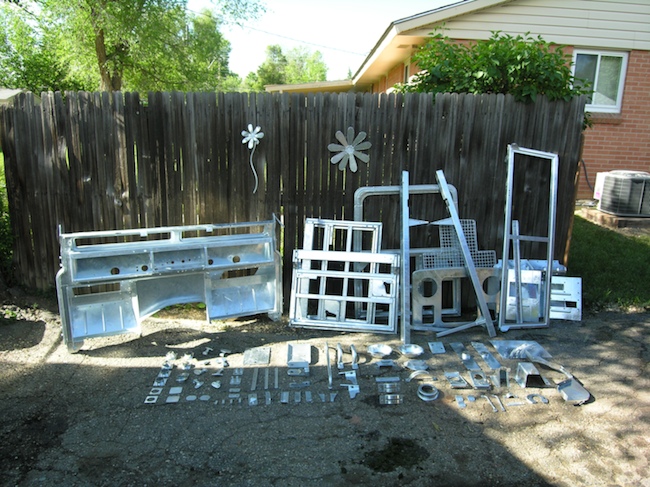
^ This is the entire collection of parts that I had dipped
 |
 |
|---|
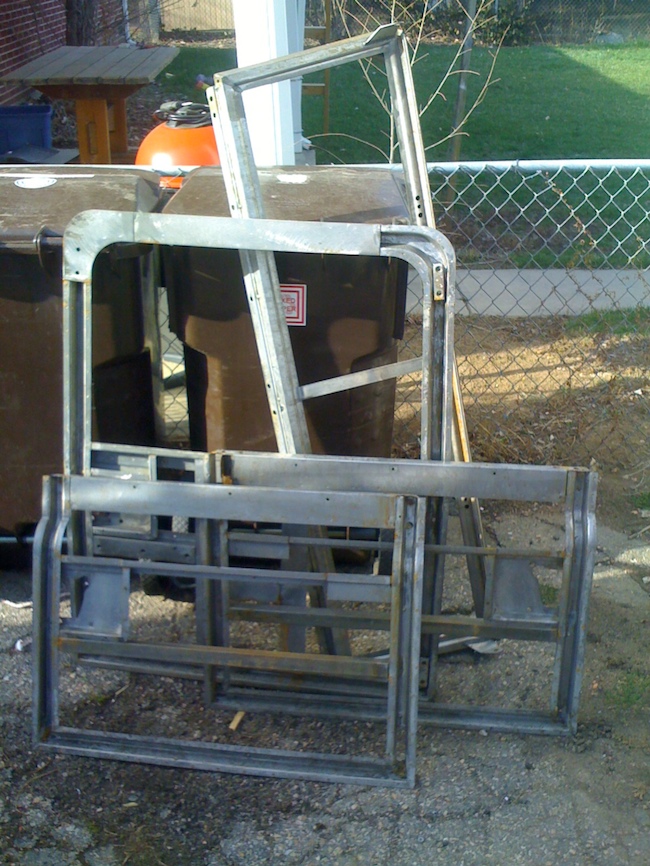
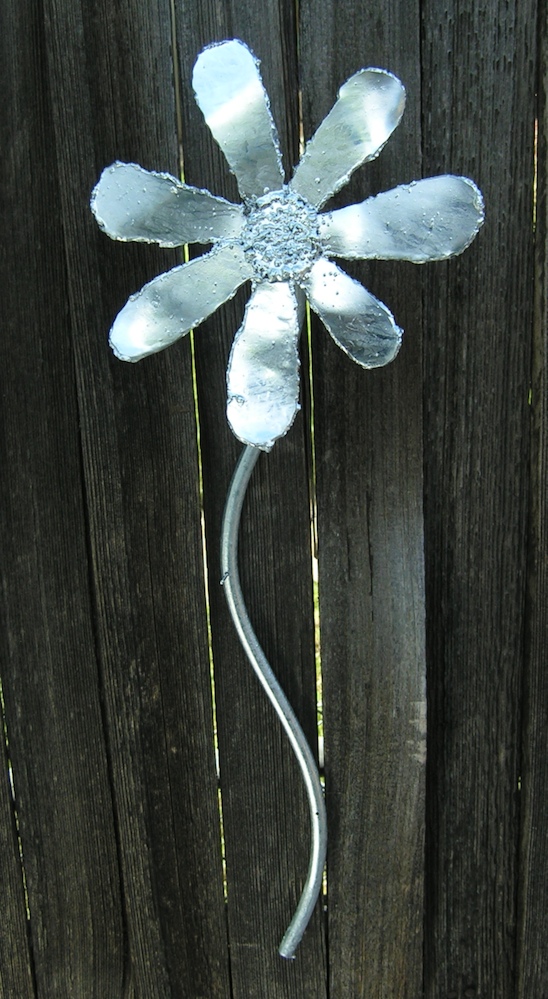
At left, the brackets I created to incorporate the a-pillars of my roll cage into a SII style dash. At right, a Botanical that faithfully served as a test subject. With great risks can sometimes come great rewards. This Botanical now stands with it's head above the crowd.